Now after everything has been prepared on the server (read; Securing SSH using Public Key authentication – Part 1: Configuring the server)
We can configure our laptop/PC/Workstation to access the server using Public Key.
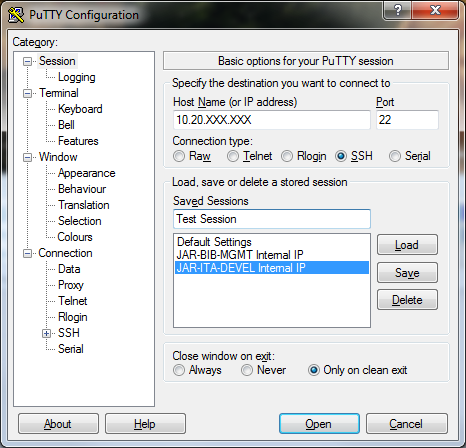
Open your PuTTY, add your server IP Server on Host Name, choose the Connection type to SSH. Named the sessions on Saved Sessions.
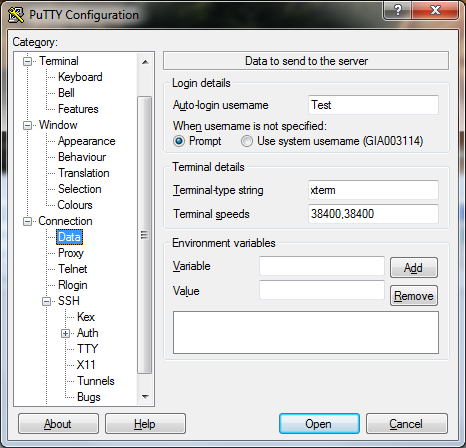
Go To Category : Connection > Data, fill the Auto-login username in Login details with your username
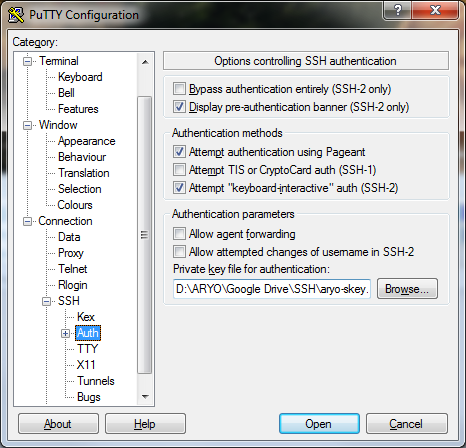
Go To Connection > SSH > Auth > Private key file for authentication and locate your Private Key location. The Private Key always have .ppk file extension.
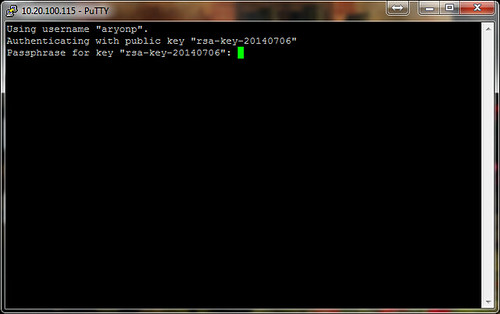
When everything has been successfully done, you will get something like below pict when you are trying to login using SSH to the server.

Securing SSH using Public Key authentication – Part 2: Accessing through SSH Client by M. Aryo N. Pratama is licensed under a Creative Commons Attribution-NonCommercial-ShareAlike 4.0 International License.
Based on a work at http://www.halilintar.org/.
Permissions beyond the scope of this license may be available at http://www.halilintar.org/.